Managing email for multiple clients can feel overwhelming when you are balancing brand control and operational efficiency. Setting up a white-label email service gives you the tools to deliver personalized solutions under your agency’s identity. With AtrioMail, you gain a unified dashboard for client management, automation, and branding customization. This guide shows you how to build a reliable email foundation, automate onboarding, and create a fully branded client experience. White-label email setup automation unlocks new efficiency for agencies and resellers worldwide.
Table of Contents
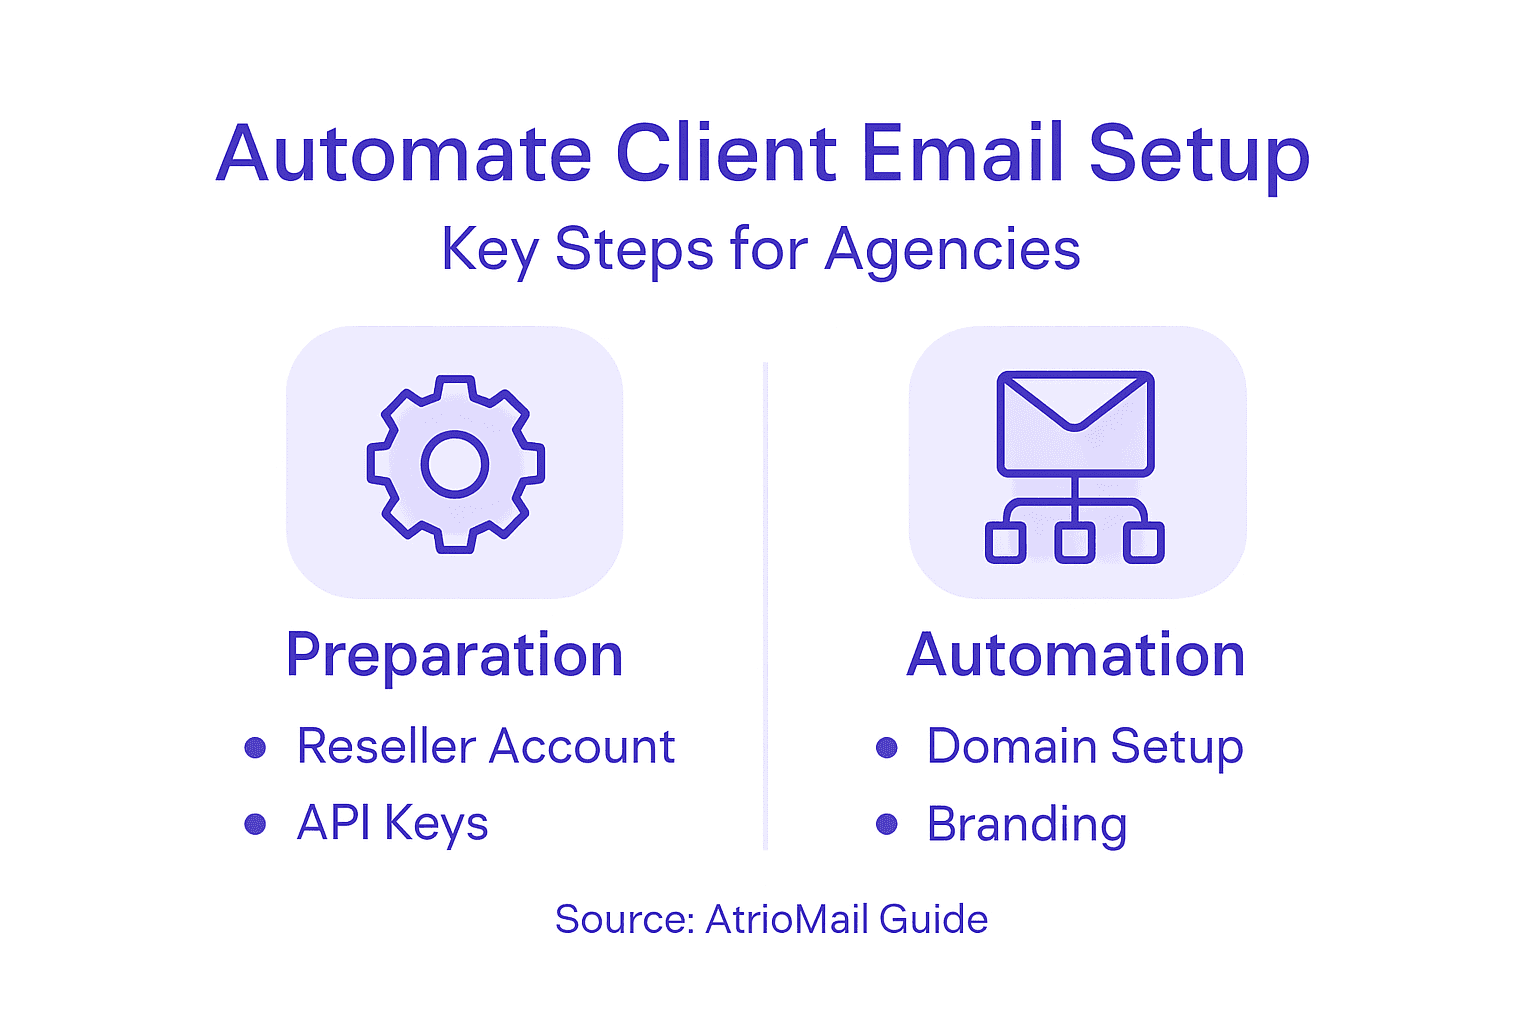
- Step 1: Set Up Your AtrioMail Reseller Account
- Step 2: Integrate Email Setup Automation via API
- Step 3: Configure Domain and DNS Validation
- Step 4: Apply Custom White-Label Branding
- Step 5: Test and Verify Automated Email Provisioning
Quick Summary
| Key Point | Explanation |
|---|---|
| 1. Set up your reseller account quickly | Creating your reseller account is a straightforward process that establishes your email service under your brand. |
| 2. Utilize the API for automation | Integrating the API streamlines client onboarding and account management, enhancing operational efficiency. |
| 3. Configure DNS for email deliverability | Proper DNS and domain validation are crucial to ensure clients’ emails are authenticated and avoid spam folders. |
| 4. Apply customized white-label branding | Customize the branding elements to create a cohesive identity that reinforces your agency’s professionalism. |
| 5. Thoroughly test your automation processes | Rigorous testing of your setups prevents issues and ensures a reliable email service for your clients. |
Step 1: Set Up Your AtrioMail Reseller Account
You’re about to create the foundation for your white-label email service. Setting up your reseller account takes just a few minutes and gives you access to everything you need to manage client email deployments under your own brand.
Start by navigating to the AtrioMail registration page and selecting the reseller account option. You’ll need to provide your business information, including your company name, contact details, and the domain you want to use for your white-label service. This domain will appear in client interfaces, so choose something that reflects your brand identity.
Once you’ve entered your basic information, create a strong account password and verify your email address. AtrioMail will send you a confirmation link—click it to activate your account. This verification step protects your account and ensures you have control over your registered email.
After confirming your email, you’ll land in your reseller dashboard. This is your command center for managing clients, monitoring usage, and configuring your service settings. Take a moment to explore the main navigation menu so you understand where everything lives.
Here’s a summary of key AtrioMail reseller dashboard areas and their practical uses:
| Dashboard Area | What It Controls | Why It’s Important |
|---|---|---|
| Client Management | Adding and organizing accounts | Streamlines onboarding and support |
| Usage Metrics Dashboard | Tracks usage and revenue | Monitors growth and profitability |
| Settings | DNS and branding customization | Ensures brand consistency |
| API Documentation | Integration endpoints and guides | Enables workflow automation |
Key items you’ll see:
- Client management section for adding and organizing accounts
- Dashboard with usage metrics and revenue tracking
- Settings area for DNS validation and white-label customization
- API documentation for integration with your systems
Your account now has access to AtrioMail’s managed infrastructure. Understanding how email account configuration and DNS validation work will help you quickly provision client accounts. When clients sign up through your platform, you’ll use this dashboard to create their email accounts, manage MX records, SPF, DKIM, and DMARC authentication, and handle ongoing support—all without touching the underlying servers.
Your reseller account is the gateway to building a profitable, fully-branded email service that scales with your agency’s growth.
Pro tip: Set up your API keys right now in the security settings, even if you don’t plan to use them immediately. Having them ready makes it trivial to integrate AtrioMail with your existing client onboarding workflows later, saving you hours of manual setup work.
Step 2: Integrate Email Setup Automation via API
API integration transforms your manual client onboarding into an automated workflow. With AtrioMail’s API, you can programmatically create email accounts, manage DNS records, and handle client provisioning without stepping into your dashboard each time.
Start by retrieving your API credentials from your reseller dashboard. Navigate to the security or integrations section and generate a new API key pair. Store these credentials securely—you’ll use them to authenticate all requests to AtrioMail’s API endpoints. Never expose your secret key in client-facing code or version control systems.
Before writing code, familiarize yourself with AtrioMail’s API documentation. Review the available endpoints for client account creation, email user provisioning, and DNS record management. Understanding email API authentication workflows will help you implement secure token-based connections that keep your clients’ data protected.
Now build your integration layer. This is typically a backend service that handles incoming requests from your client portal or billing system. When a new client signs up, your automation triggers an API call to AtrioMail that creates their email account and initializes DNS validation.
Key automation points to implement:
- New client signup triggers account creation via API
- Email user additions automatically provision mailboxes
- DNS record updates happen without manual intervention
- Billing events sync with usage data from AtrioMail
- Client removals cleanly deactivate services
Test your API integration thoroughly in AtrioMail’s sandbox environment before pushing to production. Send test requests, verify responses, and confirm that accounts appear correctly in your dashboard. This prevents surprises when real clients start signing up.
Automating account provisioning via API eliminates setup delays and gives your clients instant access to their email service.
Pro tip: Implement exponential backoff retry logic in your API calls to handle temporary service disruptions gracefully. This keeps your automation resilient and prevents failed client onboarding when network hiccups occur.
Step 3: Configure Domain and DNS Validation
Domain and DNS validation ensures your clients’ email arrives in inboxes, not spam folders. This step connects their domain to AtrioMail’s infrastructure and sets up the authentication records that prove their emails are legitimate.
Start by adding your client’s domain to AtrioMail. In your reseller dashboard, navigate to the domain management section and enter the client’s domain name. AtrioMail will generate a verification record—typically a TXT record—that you’ll add to the client’s DNS provider.

Have your client log into their domain registrar or DNS hosting panel. This could be GoDaddy, Namecheap, Cloudflare, or any DNS provider they use. Locate the DNS management or records section and add the verification TXT record AtrioMail provided. This proves domain ownership.
Once the TXT record propagates, return to AtrioMail and click “Verify Domain.” The system confirms the record exists, and your domain moves to the next stage. DNS propagation can take 15 minutes to 48 hours depending on the registrar’s TTL settings.
Now configure the core authentication records. AtrioMail handles this automatically, but understanding SPF, DKIM, and DMARC record setup will help you troubleshoot issues. Your client needs to add these records to their DNS:
This table breaks down essential DNS records and their impact on email delivery:
| Record Type | Purpose | Business Benefit |
|---|---|---|
| MX | Routes email to AtrioMail servers | Reliable inbound email delivery |
| SPF | Authorizes servers to send mail | Reduces spam and spoofing risk |
| DKIM | Adds cryptographic signing to messages | Enhances trust and authenticity |
| DMARC | Sets policy on authentication failures | Protects against email fraud |
- MX records pointing to AtrioMail’s mail servers
- SPF record authorizing AtrioMail to send mail from their domain
- DKIM record adding cryptographic verification to outgoing messages
- DMARC record setting policy for authentication failures
AtrioMail’s interface provides ready-to-use record values for each type. Copy them exactly and paste them into the client’s DNS panel. Verify each record appears correctly before moving forward.
Wait for DNS propagation to complete, then run a validation test from AtrioMail’s dashboard. Green checkmarks indicate successful authentication setup. Your client can now send and receive email with full authentication protection.
Proper DNS validation protects your client’s reputation and dramatically improves email deliverability across all mailbox providers.
Pro tip: Create a simple one-page checklist showing clients exactly which DNS records to add and where to find them in their provider’s interface. This reduces support tickets and speeds up onboarding significantly.
Step 4: Apply Custom White-Label Branding
White-label branding transforms AtrioMail into your own email service in your clients’ eyes. This step makes every touchpoint—login pages, confirmation emails, client portals—display your company name, logo, and colors instead of AtrioMail’s branding.
Begin in your reseller dashboard by locating the branding or customization settings. AtrioMail provides a dedicated section where you control how your service appears to clients. Start by uploading your company logo. This logo appears on login pages, email confirmations, and the webmail interface your clients use daily.
Next, customize your color scheme. Select your primary brand color and accent colors that match your agency’s visual identity. These colors automatically apply to buttons, headers, and navigation elements throughout the client experience. Consistency builds trust and reinforces your brand presence.
Configure your company name and domain settings. Your domain should appear as the sender in all system emails and notifications clients receive. For example, clients see emails from “[email protected]” rather than AtrioMail’s infrastructure. This creates a seamless branded experience.
Branding elements to customize:
- Company logo and favicon
- Primary brand colors and accent colors
- Support email address and sender name
- Login page messaging and imagery
- Help documentation portal URL
- Footer text and links in client communications
White-label solutions help agencies scale by eliminating the need to build custom email platforms. You leverage AtrioMail’s infrastructure while maintaining complete brand ownership and client relationships.
Preview your branding changes before publishing them. Log in as a test client to see exactly how your customizations appear. Check mobile views, email templates, and the webmail interface. Small inconsistencies can undermine your professional image.
Once you’re satisfied, publish your branding settings. They take effect immediately for all new and existing clients. Your agency now presents a unified, professional brand across every client interaction.
True white-label branding means clients never know AtrioMail exists—they only see your agency’s expertise and professionalism.
Pro tip: Create branded welcome packets with screenshots showing clients exactly how their new email service looks with your logo and colors. This simple touch dramatically increases perceived value and justifies your pricing.
Step 5: Test and Verify Automated Email Provisioning
Testing your automation ensures clients get working email accounts on day one. This step validates that your API integration, DNS configuration, and provisioning workflows function correctly before real clients depend on them.
Start by creating a test client account in your AtrioMail sandbox environment. Use a test domain you control—something like test.youragency.com. Set up this test account exactly as you would for a real client, triggering your full automation workflow from signup through email delivery.
Verify that your API calls completed successfully. Check your AtrioMail dashboard to confirm the test client account exists with correct settings. Verify that DNS records were created or that instructions were generated properly. Look for any error messages or incomplete configurations.
Send a test email from the newly provisioned email account. This validates that the mailbox actually works and that email routing functions correctly. Send messages to external addresses and monitor delivery. Check spam folders to ensure messages aren’t landing in junk despite proper authentication.
Test scenarios to validate:
- New client account creation triggers API calls
- Email user provisioning completes without errors
- DNS records validate successfully after propagation
- Test emails send and arrive in recipient inboxes
- Authentication headers (SPF, DKIM, DMARC) appear correctly
- Client login works with assigned credentials
- Automated workflows handle errors gracefully
Consider using automated email testing services to inspect email headers, verify authentication signatures, and validate content formatting. These tools catch issues that manual testing might miss.
Run stress tests with multiple simultaneous provisioning requests. Verify your system handles concurrent client signups without creating duplicate accounts or losing data. Test edge cases like domain name variations and special characters in client names.
Document any issues you find and fix them before going live. Testing now prevents embarrassing failures when actual clients depend on your service.
Thorough testing of your automation prevents costly customer support issues and builds confidence in your service reliability.
Pro tip: Create a automated test suite that runs daily in your sandbox environment, simulating real-world client onboarding scenarios. This catches regressions early when you make changes to your provisioning logic.
Simplify and Scale Your Agency’s Email Service Automation
Managing client email setup with manual steps like DNS configuration, domain validation, and branding can slow down your agency’s growth and create costly errors. This article highlights the real challenges agencies face when automating client email provisioning including API integration, DNS validation of MX, SPF, DKIM, and DMARC records, and maintaining seamless white-label experiences.
AtrioMail addresses these pain points directly by offering a fully managed, white-label email hosting platform designed specifically for resellers and IT agencies. Its powerful API automation removes the repetitive work of creating accounts and updating DNS settings. Meanwhile, built-in domain management and branding tools keep your agency’s identity front and center without exposing AtrioMail’s infrastructure. With scalable usage-based pricing and enterprise-grade deliverability, AtrioMail empowers you to increase profit margins, enhance scalability, and maintain full control over client email services.
Take the next step in transforming your client email setup process by registering your reseller account today. Discover how effortless onboarding, automation, and branded customization can be at AtrioMail Reseller Registration.
Stop struggling with manual provisioning and complex DNS tasks. Join AtrioMail now to unlock a reliable, scalable email platform that scales with your agency’s needs. Start automating your client email deployments today at https://system.atriomail.com/admin/register.
Frequently Asked Questions
How can I automate the client email setup process for my agency?
Automate the client email setup process by integrating AtrioMail’s API into your onboarding workflows. Start by retrieving your API credentials from your reseller dashboard and configure it to create email accounts and manage DNS records programmatically.
What steps do I need to take for DNS validation when setting up client email accounts?
To ensure proper DNS validation, add your client’s domain to AtrioMail, then provide the verification TXT record to their DNS provider. Confirm that the record appears correctly and verify it through the AtrioMail dashboard before proceeding with email configuration.
How can I customize the white-label branding for my agency’s email service?
Customize white-label branding by navigating to the customization settings in your reseller dashboard. Upload your company logo, select your brand colors, and set your agency’s name as the sender for all system emails to create a cohesive brand experience for your clients.
What should I test to ensure my email provisioning automation is working correctly?
Test your automation by creating a test client account and verifying that API calls complete successfully. Check if DNS records are created properly and send test emails to ensure they arrive successfully in recipient inboxes without landing in spam.
How can I ensure my automated email setup is reliable for multiple clients?
Implement exponential backoff retry logic in your API integration to handle temporary service disruptions smoothly. Additionally, run stress tests with multiple simultaneous provisioning requests to verify that your system can handle high volumes without errors or data loss.